
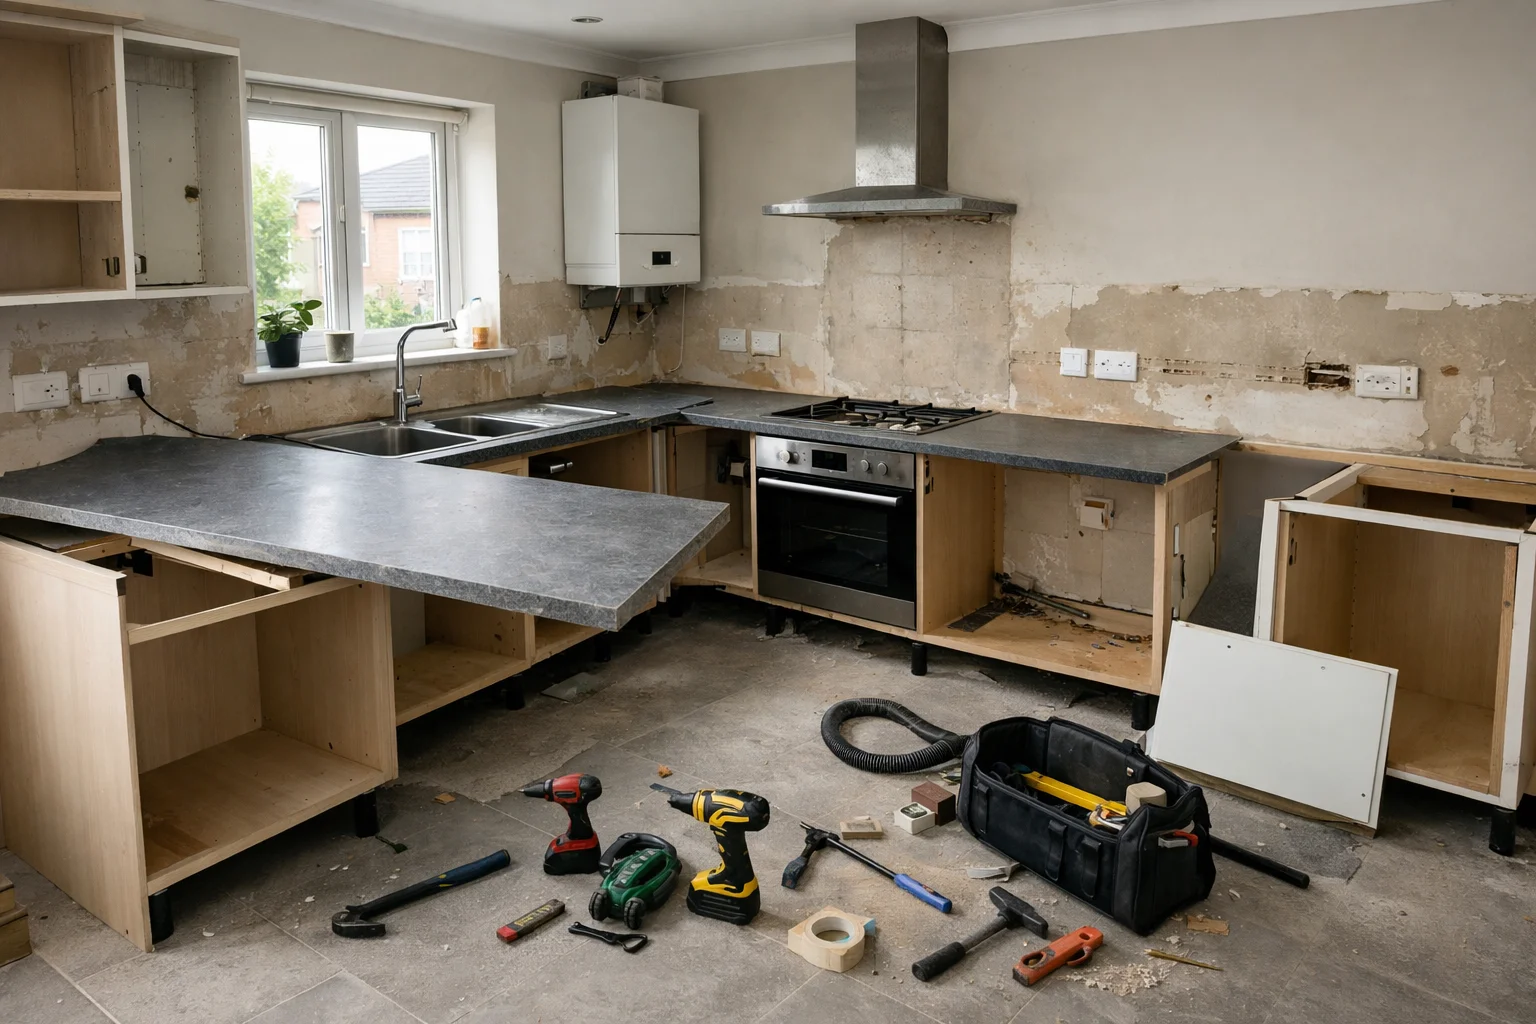
Removing a kitchen can seem like a huge task, especially when you’re trying to manage a renovation on your own. Whether you’re preparing for a complete remodel or just making space for upgrades, the removal process is a crucial first step.
Done poorly, it can cause delays, extra costs, and even damage. Done well, it clears the way for a smooth transformation of your kitchen space. This blog is designed for UK homeowners and renters who want to manage a kitchen removal efficiently and with minimal stress.
Whether you’re planning a DIY job or weighing up hiring professionals, this guide walks you through every essential stage, from disconnecting utilities and organising tools, to waste disposal and post-removal preparation. By the end, you’ll have a clear understanding of how to manage your kitchen removal safely, legally, and effectively, with no unnecessary setbacks.
What Should You Do Before Starting a Kitchen Removal?

Before dismantling begins, it’s vital to prepare your home, space, and schedule to avoid mistakes and disruption. Start by assessing whether you’re taking on the removal yourself or bringing in professional help. This depends on your confidence, tools, and whether you’re dealing with gas or electrical disconnections.
Next, remove everything from the kitchen, clear out cupboards, drawers, and appliances. Pack and label reusable items, especially if you plan to sell or reinstall them later. Photograph your current kitchen layout before disassembly, this can help during the refit or for reselling parts.
Plan for how long you’ll be without a kitchen. Set up a temporary one with basics like a kettle, microwave, toaster, and washing-up station. It’s wise to notify your neighbours, especially in shared buildings, to avoid complaints from noise or waste.
And finally, double-check your local council’s regulations on skip placement, parking, and working hours if you’re managing the process yourself.
How Do You Safely Isolate Utilities Before Removing A Kitchen?
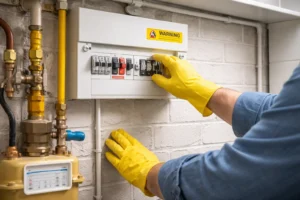
Safety always comes first. Disconnecting your utilities is a non-negotiable task before any kitchen removal, and it’s essential to follow proper procedures to avoid hazards.
- Turn off electricity at the main fuse box. Unplug all appliances that aren’t hardwired. For integrated appliances like built-in ovens or extractor fans, hire a certified electrician for safe disconnection.
- Switch off the gas supply at the isolation valve near the meter. Never attempt to disconnect a gas cooker or hob yourself, use a Gas Safe registered engineer for this step.
- Shut off the water supply at the internal stopcock. Detach pipes from sinks, dishwashers, and washing machines carefully. Use towels or a bucket to catch any residual water.
- Clearly label all disconnected pipes and wires, especially if you plan to reuse them during your kitchen refit.
Failure to isolate utilities properly can result in flooding, electric shock, gas leaks, or serious injury. When in doubt, get a qualified tradesperson involved, safety is not worth risking.
In What Order Should You Remove Kitchen Components?
A smooth kitchen removal relies heavily on dismantling components in the right sequence. Following a logical removal order reduces damage and makes the process much more efficient.
- Start with appliances such as the fridge, cooker, microwave, and dishwasher. Unplug them and set them aside or prepare them for disposal.
- Remove doors and drawers from cabinets. These are lighter and make the remaining structure easier to manage.
- Unscrew base units and wall cabinets from each other and the walls. Use a screwdriver and keep screws if you plan to reuse or donate.
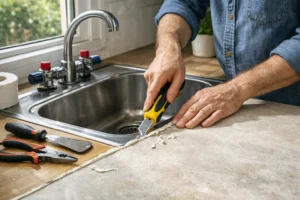
- Take out the worktops by removing the fixing brackets from beneath. Cut through any sealant using a utility knife.
- Disconnect and lift the sink once plumbing is detached. Be cautious of residual water in pipes.
- Remove splashback tiles or wall coverings last, using a bolster chisel and hammer with protective gear.
This order helps maintain control throughout the process, minimising mess and preventing structural damage.
What Tools And Materials Do You Need For Kitchen Removal?
Having the right tools to hand makes kitchen removal not only faster but also safer. Whether you’re going DIY or helping a tradesperson, this list covers the essential items.
You’ll need manual and power tools, including a drill, screwdriver set, utility knife, adjustable wrench, and pry bar. A bolster chisel and hammer are essential for tile removal, while safety gear such as gloves, goggles, and a dust mask protect you throughout. Consider keeping buckets or towels nearby for unexpected leaks when disconnecting plumbing.
Here’s a handy breakdown of tools and their uses:
| Tool/Material | Purpose |
| Screwdrivers & drill | Remove cabinets, doors, and fixtures |
| Utility knife | Cut sealant or adhesive |
| Adjustable wrench | Disconnect plumbing fixtures |
| Pry bar | Lift cabinets and worktops |
| Hammer & chisel | Remove tiles or wall panels |
| Dust mask & gloves | Protect from debris and sharp edges |
| Buckets and towels | Catch water from pipes |
| Sealant remover | Clean worktop or sink edges for reuse |
Always inspect tools before use and wear your protective equipment throughout the process.
How Do You Remove a Kitchen Step by Step?
Removing a kitchen requires careful planning and a structured approach. Whether you’re doing it yourself or helping alongside professionals, following the correct sequence of steps helps avoid delays, damage, and unnecessary stress. Here’s how to carry out a full kitchen removal step by step.
Step 1: Isolate All Utilities
Start by turning off all utility supplies to ensure safety. Switch off the electricity at the consumer unit, shut off the water using the stopcock, and isolate the gas supply at the main valve.
If any appliances are hardwired or gas-powered, contact qualified professionals to disconnect them. Never attempt to remove gas appliances on your own. Once everything is safely turned off, label all wires and pipes clearly so they’re ready for the refit or further works.
Step 2: Clear The Kitchen

Empty every cabinet, drawer, and shelf before starting the dismantling process. Separate what you plan to keep, reuse, sell, or discard. Place frequently used items like cutlery, mugs, or cleaning supplies in accessible storage for use during the renovation.
It’s helpful to pack and label boxes to keep things organised. Taking photos of the kitchen layout before disassembly can help with selling parts or guiding the refit. This also reduces confusion when reinstalling appliances or fixtures.
Step 3: Protect Floors And Surroundings
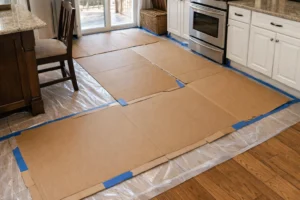
Before dismantling anything, lay down dust sheets, cardboard, or protective coverings on your floors and any nearby furniture. This prevents scratches, debris damage, and paint scuffs. If you’re working near adjacent rooms, seal doorways with plastic sheets to minimise dust travel.
Remove light fittings, blinds, or decor that might get in the way during removal. Safety is key, so also make sure you’re wearing protective gloves, goggles, and non-slip footwear to reduce the risk of injury.
Step 4: Disconnect And Remove Appliances

Begin the physical removal by carefully disconnecting appliances like the fridge, oven, dishwasher, and microwave. Unplug them and pull them out gently, making sure not to snag wires or hoses. For plumbed-in items, drain any excess water using towels or a bucket.
Label cables and connectors for easy reconnection. Some appliances, like integrated ovens or extractor hoods, may require unscrewing from cabinetry. Set aside anything you plan to reuse or sell and avoid stacking items unsafely.
Step 5: Take Out Cabinets And Drawers
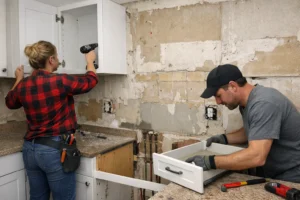
Remove all cabinet doors first by unscrewing the hinges. Always support the door’s weight while doing this to prevent injury or damage. Next, pull out drawers from their runners, most have simple clips or levers to release them.
Once drawers and doors are off, unscrew the units from each other and the walls. Start with base cabinets, then move on to wall units with the help of a second person for lifting. Store screws and brackets safely.
Step 6: Remove Worktops And Sink
Worktops are typically secured from underneath using brackets or bolts. Unscrew these fixings, then use a utility knife to cut through any sealant or adhesive along the edges. With help, lift the worktop away carefully.
If a sink is installed in the worktop, ensure plumbing is disconnected before removal. Use towels or a small bucket to catch any residual water. Once the sink is out, you can inspect the plumbing for damage or plan for adjustments in your refit.
Step 7: Lift Flooring And Remove Tiles
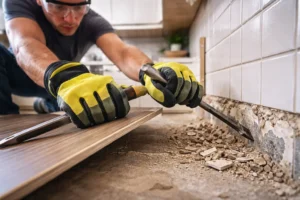
If your kitchen renovation includes replacing flooring or wall tiles, now is the time to remove them. Start by lifting vinyl or laminate flooring at one corner and working your way across.
For tiles, use a bolster chisel and hammer to carefully chip them away, beginning at the bottom row of splashbacks or wall coverings. Always wear thick gloves and safety goggles when handling broken tiles, and dispose of sharp debris safely to avoid injury or floor damage.
Step 8: Organise Waste And Recyclables
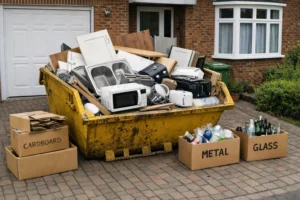
Sort all removed items into categories: reuse, resell, recycle, or dispose of. For reusable parts like doors or appliances, store them securely or list them online. Hire a skip in advance if you have large volumes of waste, or arrange a bulky item collection through your local council.
Hazardous materials such as fridges must be disposed of properly. Keeping waste organised will make the final clean-up faster and ensure you comply with UK disposal regulations.
Step 9: Clean And Inspect The Space
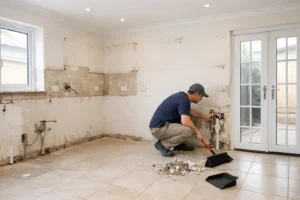
With everything removed, carry out a full clean of the room. Sweep, vacuum, and mop the floor to eliminate dust and debris. Inspect the walls, floors, and ceiling for signs of damage or areas needing repair before your new kitchen is installed.
Look for signs of leaks, mould, or broken fittings. This is also the ideal time to complete plastering, rewire any electrics, or reroute plumbing if needed. A clean, inspected space ensures your refit can start smoothly.
Following this detailed step-by-step process ensures your kitchen removal is safe, thorough, and ready for the next phase of your renovation. Take your time with each stage and don’t hesitate to get help for any part involving electrics, plumbing, or heavy lifting.
What’s A Complete Kitchen Removal Checklist For UK Homes?
Organisation is the key to a smooth kitchen removal. A checklist gives you control over what needs to be done, before, during, and after.
Use this uniquely structured checklist to stay on top of your task list:
| Task | Description |
| Notify local council | Check noise and skip placement regulations |
| Hire skip or waste service | Schedule collection ahead of removal day |
| Shut off gas, water, electric | Confirm disconnection before starting |
| Empty kitchen and box items | Label for reuse, donation, or disposal |
| Photograph kitchen layout | Useful if reassembling or reselling units |
| Set up temporary kitchen | Ensure food prep and essentials are available |
| Label pipes and wiring | Helps future trades during refit |
| Plan access for large items | Clear hallways and doorways in advance |
| Inform neighbours | Avoid noise complaints, especially in flats |
Each item in this list tackles a specific removal concern, from legal permissions to daily living arrangements. Complete this list step by step and your kitchen removal will not only be effective but also hassle-free.
What Are Your Options For Kitchen Waste Disposal In The UK?

Disposing of a kitchen legally and responsibly is essential. In the UK, there are several options for managing kitchen waste depending on your location, timeline, and how much waste you generate.
Skip Hire
Skips are the most popular solution for full removals. They cost between £100 and £250, depending on size and location. If the skip is going on a public road, you’ll need a permit from your local council. Make sure your provider is licensed and can confirm what materials are accepted.
Council Bulky Waste Collection
Local councils offer collection of bulky kitchen items. This includes old cupboards, worktops, or white goods. Fees vary, and booking in advance is essential. Some councils may not take fridges or hard materials like tiles.
Household Recycling Centres
Your nearest recycling centre is ideal for one-off drop-offs of appliances or cabinets. You may need to pre-book, and proof of residence is often required. Items like sinks, small appliances, and even doors are usually accepted.
Private Clearance Companies
A fast and full-service option, private companies handle collection, loading, and disposal. Ensure they’re registered with the Environment Agency and ask for disposal confirmation. This is ideal if you’re short on time or want peace of mind.
Reuse, Donate, or Sell
If your cabinets, doors, or appliances are still functional, consider listing them on Freecycle, Facebook Marketplace, or Gumtree. Charities like The British Heart Foundation may collect reusable furniture and white goods. It’s a great way to reduce landfill and help others.
Hazardous Materials
Items like fridges and freezers require specific disposal methods due to refrigerant gases. Councils may offer collection or direct you to authorised drop-off points. Never leave these in skips without checking, fines can apply. Choosing the right disposal method keeps your kitchen removal legal, eco-friendly, and affordable.
When Is It Better To Hire A Professional Kitchen Removal Service?
While a DIY kitchen removal can save money, there are clear situations when hiring a professional is not only safer but more cost-effective. A trained team ensures speed, compliance, and minimal disruption.
- You’re dealing with gas disconnections or hardwired appliances
- There are complex materials like granite worktops or full-wall splashbacks
- The removal is part of a tight renovation schedule
- You lack the right tools or physical capability for safe lifting
- You want one provider to handle removal, disposal, and clean-up
Professionals also handle hazardous waste, ensure safety compliance, and often recycle materials on your behalf. While it may seem like an added cost, it often saves time, stress, and potential repair bills. If you’re not confident managing every aspect of a removal, it’s wise to invest in expert help.
How Much Does Kitchen Removal Cost In The UK?
Kitchen removal costs vary widely depending on location, kitchen size, materials, and whether you’re hiring a team or doing it yourself. Here’s a breakdown of what you might expect across the UK.
Average Kitchen Removal Costs in the UK
| Service/Item | Estimated Cost Range |
| Basic Removal (no disposal) | £200 – £400 |
| Full Dismantling (incl. disposal) | £400 – £700 |
| Appliance Removal (per item) | £50 – £150 |
| Worktop Removal (per piece) | £100 – £200 |
| Sink or Tap Disconnection | £50 – £100 |
| Wall/ Base Cabinets (per unit) | £50 – £100 |
| Specialty Cabinets or Larder | £75 – £150 |
| Lighting Fixtures | £20 – £100 |
| Flooring Removal (per room) | £50 – £150 |
| Eco-Disposal Surcharge | £50 – £100 |
| Skip Hire | £100 – £250 |
| Private Waste Collection | £100 – £300+ |
London and the South East typically have the highest labour rates, while Northern and rural areas are more cost-efficient. If you’re working with a builder or kitchen fitter, some removal costs may be bundled into their quote, so always clarify what’s included.
What Are Common Kitchen Removal Mistakes To Avoid?

Removing a kitchen might seem straightforward, but there are plenty of common pitfalls that can cause delays, damage, or injury.
Here are some of the most avoidable mistakes:
- Not disconnecting utilities safely before starting
- Skipping protective gear like gloves or goggles
- Forgetting to label wires or plumbing for the refit
- Damaging cabinets, worktops, or appliances you planned to sell
- Underestimating how much waste will be generated
- Not booking skip hire or council collection in time
- Trying to remove gas appliances without a professional
- Forgetting to check with neighbours or the council
Preparation is everything. If you’re unsure about any part of the process, it’s better to pause and seek advice. Mistakes can be costly, especially if they involve water damage, electrical faults, or legal disposal issues.
What Should You Do After Removing Your Kitchen?
Once your kitchen is fully removed, the space should be cleared, cleaned, and assessed to ensure it’s ready for installation or temporary use. This post-removal stage is just as important as the dismantling itself.
- Sweep and vacuum thoroughly to remove dust and debris
- Inspect walls and flooring for damage or repair needs
- Seal off exposed pipes or wires if the refit isn’t immediate
- Complete plastering, painting, or prep work before new units arrive
- Check all plumbing and electrics are accessible for the refit team
- Plan your layout or flooring adjustments while the space is open
If there’s a gap between removal and installation, consider how you’ll use the space. Temporary storage, extra workspace, or even a make-shift kitchen corner may be necessary. Make sure everything is safe and tidy to avoid hazards.
Conclusion
Removing a kitchen is the first step in transforming your space, and with the right planning, it doesn’t have to be stressful. By safely disconnecting utilities, removing components in order, and organising waste disposal early, you can keep the process efficient and damage-free.
Whether you’re going the DIY route or bringing in help, preparation is key to avoiding unnecessary delays or risks. And once the job is done, clearing the debris is just as important.
Our rubbish removal services make it easy to dispose of old units, worktops, and appliances, quickly, responsibly, and in line with UK regulations. Start your renovation the smart way: safe, tidy, and ready for your new kitchen.
FAQs
How long does it take to remove a kitchen?
Most kitchen removals take between one to two days, depending on size and complexity. DIY removals may take longer if done in stages.
Can I remove my kitchen myself without professional help?
Yes, you can remove a kitchen yourself if you’re comfortable with tools and safe utility disconnection. However, gas and electrical tasks must be handled by qualified professionals.
What parts of my old kitchen can be reused or sold?
Cabinets, worktops, sinks, and appliances in good condition can often be reused or sold online. Taking care during removal increases the resale value.
Do I need permission from the council to remove my kitchen?
Generally, you don’t need planning permission for kitchen removal inside your own home. But you may need a skip permit if placing waste bins on public roads.
What is the safest way to dispose of an old fridge?
Old fridges must be disposed of through council collection or licensed waste carriers due to hazardous refrigerants. Never place them in a general skip without checking local regulations.
Should I remove the flooring before or after kitchen cabinets?
It’s usually better to remove flooring after cabinets to avoid unnecessary damage. However, if replacing the floor completely, lifting it first may simplify the refit.
How can I prepare my home for living without a kitchen during renovations?
Set up a temporary kitchen area with essentials like a kettle, microwave, and small fridge in another room. Pre-cook meals or plan for simple dishes during the transition.


